To cook chicken livers in air fryer, preheat the air fryer, season the chicken livers, and cook them in the air fryer for 10-12 minutes until they are cooked through and golden brown. Air frying chicken livers is a quick and easy way to enjoy them without the need for deep frying.
In this article, we will guide you through the steps to cook chicken livers in an air fryer, providing you with a delicious and healthy option for incorporating this nutritious organ meat into your meals. From preheating the air fryer to properly seasoning and cooking the chicken livers, we will cover everything you need to know for a successful air frying experience.
So, let’s get started and learn how to cook chicken livers in an air fryer.

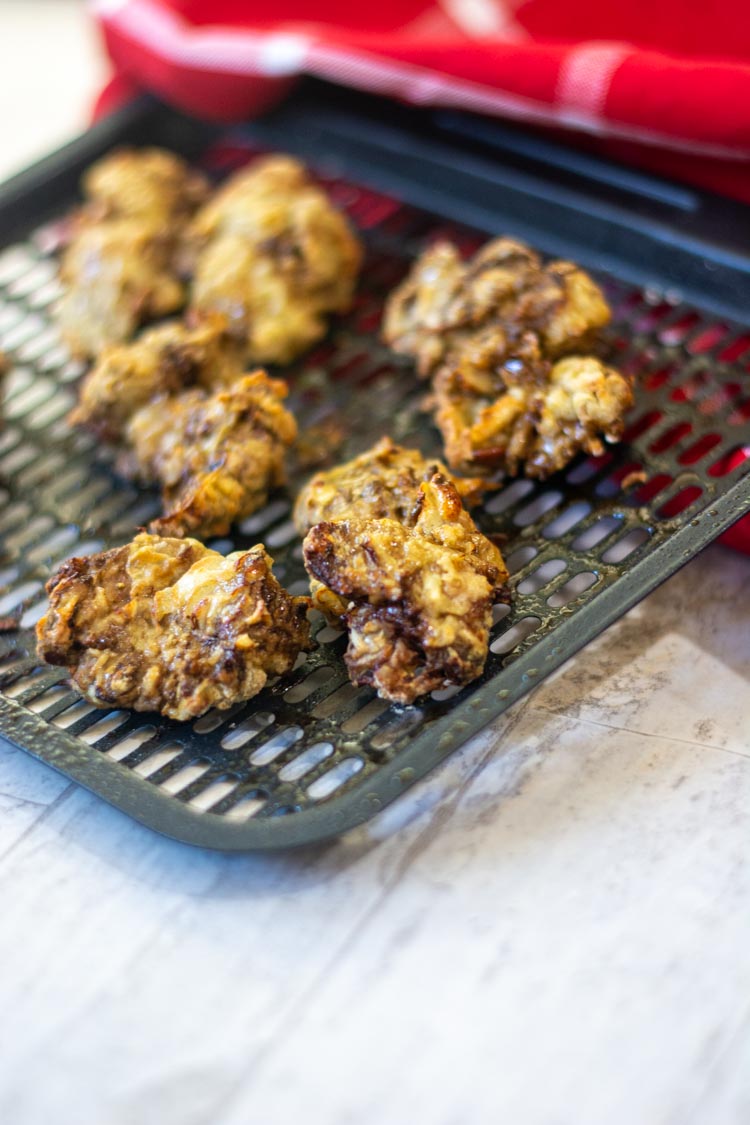
Credit: blackpeoplesrecipes.com
Cleaning And Removing Any Impurities
Cooking chicken livers in an air fryer can be a delicious and healthy way to enjoy this nutrient-packed organ meat. To ensure that your chicken livers come out perfectly cooked and free of any impurities, it’s important to follow the proper cleaning and preparation steps.
In this section, we will walk you through the process of cleaning the chicken livers and removing any membranes or connective tissues, guaranteeing a delicious outcome.
Properly Rinsing The Chicken Livers:
- Start by placing the chicken livers in a colander and rinsing them under cold running water. This helps remove any surface impurities and excess blood.
- Gently pat the livers dry with a paper towel to remove any excess moisture.
- Place the clean and dry chicken livers on a cutting board, ready for the next step.
Removing Any Membranes Or Connective Tissues:
- Carefully examine each chicken liver and look for thin membranes or any connective tissues that may be present.
- Use a sharp knife to gently remove these membranes or tough tissues. Be cautious not to remove too much of the liver.
- Take your time and ensure that each liver is free of any unwanted parts.
By properly cleaning and removing any impurities from the chicken livers, you’ll enhance the flavor and texture of the final dish. So, let’s move on to the next step and explore how to season and cook the chicken livers in the air fryer.
Marinating The Chicken Livers For Enhanced Flavor
Selecting The Right Marinade Ingredients:
- The marinade that you choose plays a crucial role in elevating the flavor of your chicken livers. Here are some key factors to consider when selecting the marinade ingredients:
- Acidic base: Opt for an acidic component, such as vinegar or citrus juice, to help tenderize the chicken livers and infuse them with flavor.
- Herbs and spices: Experiment with an array of herbs and spices to enhance the taste of the marinade. Popular options include garlic, thyme, rosemary, paprika, and cayenne pepper.
- Oil: Incorporating oil into your marinade helps lock in moisture and adds richness to the dish. Olive oil, sesame oil, or even melted butter are excellent choices.
- Salt and pepper: Seasoning with salt and pepper is essential to bring out the natural flavors of the chicken livers.
Incorporating Flavors That Complement The Dish:
- Keep in mind that the marinade should not overpower the delicate taste of chicken livers. Here are some points to consider when incorporating complementary flavors:
- Balanced sweetness: Depending on your personal preference, you can add a touch of sweetness with ingredients like honey or brown sugar. This helps balance the overall flavor profile.
- Umami boosters: Ingredients like soy sauce or worcestershire sauce can add depth and savory umami notes to the marinade, enhancing the overall taste of the dish.
- Citrus zest: To add a bright and refreshing element, consider incorporating citrus zest from lemons or oranges. This adds a burst of tanginess to complement the richness of the chicken livers.
- Onion and garlic: These aromatic ingredients lend depth and intensity to the marinade, providing a robust flavor to the chicken livers.
Marinating chicken livers can elevate their taste and make them even more delicious. By choosing the right marinade ingredients and incorporating complementary flavors, you can create a delicious dish that will excite your taste buds. So, let’s dive into the world of flavors and discover how to marinate chicken livers for enhanced flavor in your air fryer.
Preheating The Air Fryer For Optimal Results
Before cooking chicken livers in an air fryer, it is essential to preheat the appliance. Preheating ensures that the air fryer is at the ideal temperature for cooking, resulting in perfectly crispy and flavorful chicken livers. Here are the key points to remember when preheating your air fryer:
- Setting the air fryer temperature and time: Always refer to the specific recipe or manufacturer’s instructions for the recommended temperature and time settings. However, a general guideline for cooking chicken livers in an air fryer is to preheat it to 400°f (200°c).
- Uniform heat distribution: By preheating the air fryer, you allow the appliance to distribute the heat evenly, ensuring that the chicken livers are cooked thoroughly and uniformly. This eliminates any risk of undercooking or overcooking.
- Time-saving advantage: Preheating the air fryer in advance helps reduce the total cooking time. Since the appliance is already hot, it can immediately start cooking the chicken livers once they are placed inside. This convenience makes air frying an attractive option for busy individuals.
- Crispy exterior and juicy interior: Preheating the air fryer creates the perfect cooking environment for chicken livers. The high temperature helps to achieve a crispy exterior, while the hot circulating air maintains the tenderness and moisture inside. This combination results in chicken livers that are both crispy and juicy.
- Energy efficiency: Preheating the air fryer for a few minutes before cooking helps optimize energy usage. This means you can enjoy deliciously cooked chicken livers while being mindful of your energy consumption.
By following these preheating guidelines, you can ensure that your air-fried chicken livers turn out to be a delightful and tasty dish. Now that you know how important preheating is, let’s move on to the next step – preparing the chicken livers for cooking!
Coating The Chicken Livers For A Crispy Texture
When it comes to cooking chicken livers in an air fryer, achieving a crispy and flavorful coating is key. The right coating not only enhances the taste but also ensures that each piece of liver is cooked to perfection. In this section, we will explore two popular options for coating chicken livers: using breadcrumbs or a flour mixture.
Let’s dive in!
Using breadcrumbs:
- Breadcrumbs are a classic choice for creating a crispy coating on chicken livers. They add a delicious crunch and help seal in the moisture, resulting in juicy and tender livers.
- To coat the chicken livers with breadcrumbs, start by dipping each piece in beaten egg or buttermilk. This will allow the breadcrumbs to adhere properly.
- Next, place the chicken livers in a ziplock bag with breadcrumbs and shake gently to coat them evenly. You can use regular breadcrumbs or get creative with seasoned ones, adding extra flavor to your dish.
- Once coated, transfer the chicken livers to the air fryer basket, ensuring they are spaced evenly to allow for proper air circulation. Cook at the recommended temperature and time, flipping halfway through for an even browning.
Using a flour mixture:
- Alternatively, you can opt for a flour coating to achieve a crispy texture on your chicken livers. This method provides a lighter and less crunchy coating compared to breadcrumbs.
- To create a flour mixture, combine all-purpose flour with your choice of spices and seasonings. Paprika, garlic powder, and salt are common additions that enhance the flavor of the chicken livers.
- Before coating the livers, pat them dry with paper towels to remove any excess moisture. This will help the flour mixture adhere better and prevent clumping.
- Dip each chicken liver into the flour mixture, making sure to coat it thoroughly on all sides. Shake off any excess flour before transferring it to the air fryer basket.
- Cook the chicken livers in the air fryer according to the recommended temperature and time, flipping halfway through to ensure even cooking.
Remember, whether you choose breadcrumbs or a flour mixture, the key to achieving a crispy texture is an even coating on each chicken liver. By following these simple steps, you’ll be able to enjoy deliciously crispy chicken livers prepared in your air fryer.
Happy cooking!
Placing The Chicken Livers In The Air Fryer
When it comes to cooking chicken livers in an air fryer, proper placement is key to achieving crispy and delicious results. Here are some important points to keep in mind:
- Arranging the livers in a single layer: Before placing the chicken livers in the air fryer basket, make sure to spread them out in a single layer. This ensures that each liver receives even heat distribution, resulting in uniform cooking and browning.
- Avoiding overcrowding for proper air circulation: It’s important not to overcrowd the air fryer basket with too many chicken livers. Overcrowding can impede proper air circulation, leading to uneven cooking and less crispy results. Leave enough space between the livers to allow hot air to circulate around them.
- Ensuring even cooking with occasional shaking: To further promote even cooking, it’s a good idea to shake the air fryer basket once or twice during the cooking process. This helps to redistribute the livers and ensures that they cook evenly on all sides.
- Monitoring cooking time for desired doneness: Chicken livers can cook relatively quickly in an air fryer, so it’s essential to keep a close eye on them. Start checking for doneness after the recommended cooking time, and if needed, cook for additional time until the livers reach your desired level of doneness.
- Removing cooked livers promptly: Once the chicken livers are cooked to perfection, remove them from the air fryer promptly to prevent them from becoming overcooked or drying out. Transfer them to a plate or serving dish, and they are ready to be enjoyed.
By following these guidelines, you can ensure that your chicken livers are cooked to perfection in the air fryer. With their crispy exterior and flavorful interior, they make for a delightful appetizer or addition to various dishes. Experiment with different seasonings and dipping sauces to enhance their taste and enjoy a satisfying meal.
Happy cooking!
Cooking The Chicken Livers To Perfection
Cooking chicken livers in an air fryer is a simple and efficient way to achieve a crispy and delicious result. With just a few key steps, you can elevate this humble ingredient into a delectable dish. Here’s how to cook the chicken livers to perfection in your air fryer:
Setting The Air Fryer Timer
- Start by preheating your air fryer to the recommended temperature, usually around 400°f.
- Place the seasoned chicken livers in a single layer in the air fryer basket. Avoid overcrowding to ensure even cooking.
- Set the timer for the required cooking time, typically around 8-10 minutes. However, this may vary depending on the size and thickness of the chicken livers.
- It’s important to note that different air fryer models may vary in cooking times, so adjust accordingly.
Monitoring The Cooking Process And Adjusting As Needed
- Keep a close eye on the chicken livers as they cook. It’s essential to monitor the progress to avoid over or undercooking.
- After the initial cooking time, check the chicken livers for doneness. They should be crispy on the outside and cooked through on the inside.
- If the chicken livers require more cooking time, simply adjust the timer and continue cooking in short increments, checking for the desired texture.
- Consider flipping the chicken livers halfway through the cooking process to ensure an even crispiness on all sides.
By following these steps and keeping a close watch on the cooking process, you can achieve perfectly cooked chicken livers in your air fryer. Serve them as a delightful appetizer or incorporate them into your favorite recipes for a flavorful addition.
Enjoy the crispy goodness that awaits!
Delicious Ways To Serve Cooked Chicken Livers
Chicken livers can be a flavorful and nutritious addition to your meals, especially when cooked in an air fryer. If you’re looking for delicious ways to serve cooked chicken livers, we’ve got you covered. From tangy dipping sauces to hearty salads and pasta dishes, here are some creative ideas to make the most out of this humble organ meat.
Pairing With A Tangy Dipping Sauce:
- Spicy sriracha mayo: Mix equal parts of mayonnaise and sriracha sauce for a tangy and spicy dip that complements the richness of the chicken livers.
- Zesty lemon garlic aioli: Combine mayonnaise, freshly squeezed lemon juice, minced garlic, and a pinch of salt for a creamy and tangy dipping sauce that enhances the flavors of the chicken livers.
- Creamy ranch dip: Whip up a simple ranch dip using sour cream, mayonnaise, fresh herbs like dill and parsley, garlic powder, onion powder, and a squeeze of lemon juice to balance the richness of the chicken livers.
Incorporating Into A Hearty Salad Or Pasta Dish:
- Chicken liver salad: Toss cooked chicken livers with mixed greens, cherry tomatoes, sliced red onions, and a lemon vinaigrette for a refreshing and wholesome salad.
- Creamy chicken liver pasta: Saute cooked chicken livers with garlic, onions, and mushrooms, then toss them with cooked pasta, a splash of cream, and a sprinkle of parmesan cheese for a rich and comforting pasta dish.
- Chicken liver pâté crostini: Blend cooked chicken livers with butter, shallots, herbs, and a splash of brandy until smooth. Spread this decadent pâté over toasted baguette slices for an elegant appetizer or light meal.
Whether you choose to pair your cooked chicken livers with tangy dipping sauces or incorporate them into hearty salads and pasta dishes, these ideas are sure to elevate your culinary experience. Give them a try and discover the delicious versatility of chicken livers prepared in an air fryer.
Tips For Reheating Leftover Chicken Livers
Whether you have some leftover chicken livers from last night’s dinner or you intentionally cooked a large batch, finding the best way to reheat them can be a challenge. You don’t want your crispy chicken livers to end up dry or lose their crunchy texture.
Luckily, with a few simple tips, you can ensure that your reheated chicken livers are just as delicious as when they were freshly cooked. Let’s dive into the best practices for maintaining their crispy texture and proper storage to avoid drying out.
Maintaining Their Crispy Texture:
- Air fryer method: Reheating chicken livers in an air fryer is an excellent way to maintain their crispy exterior. Follow these steps for optimal results:
- Preheat your air fryer to 375°f.
- Spread the chicken livers in a single layer in the air fryer basket.
- Reheat for 3-4 minutes, shaking the basket halfway through to ensure even heating.
- Check for crispiness, and if needed, continue reheating in 1-minute increments until they reach your desired crispiness.
- Oven method: If you don’t have an air fryer, the oven can also be utilized to reheat chicken livers while preserving their crispiness:
- Preheat your oven to 375°f.
- Place the chicken livers on a baking sheet in a single layer.
- Reheat for approximately 5-7 minutes, or until they reach your desired crispiness.
- Keep an eye on them to avoid overcooking and drying out the livers.
Proper Storage To Avoid Drying Out:
- Refrigeration: If you plan to reheat chicken livers within a day or two, store them in an airtight container in the refrigerator. Here’s how to do it right:
- Allow the chicken livers to cool completely before transferring them to the container.
- Place a layer of parchment or wax paper between each liver to prevent them from sticking together.
- Seal the container tightly to keep moisture from entering and drying out the livers.
- Freezing: If you want to store chicken livers for a longer period, freezing is a great option. Follow these steps to maintain their texture and flavor:
- Let the chicken livers cool completely, then transfer them to a freezer-safe container.
- Label the container with the date for reference.
- When reheating, thaw the frozen chicken livers in the refrigerator overnight before using your preferred reheating method.
Wrap-Up:
Remember, maintaining the crispy texture of reheated chicken livers is all about using the right cooking method, such as an air fryer or oven, while ensuring proper storage to avoid drying them out. By following these tips, you’ll be able to enjoy the deliciousness of your leftover chicken livers without sacrificing their crispy exterior.
So, go ahead and savor every crunchy bite!
Frequently Asked Questions On How To Cook Chicken Livers In Air Fryer
Can You Cook Chicken Livers In An Air Fryer?
Yes, you can definitely cook chicken livers in an air fryer. It’s a healthier alternative to frying and gives the livers a crispy texture while keeping them moist and juicy on the inside.
How Long Does It Take To Cook Chicken Livers In An Air Fryer?
Cooking time may vary based on the size of the livers, but typically it takes about 10-15 minutes to cook chicken livers in an air fryer. It’s important to preheat the air fryer and check for doneness before removing them.
What Temperature Should I Cook Chicken Livers In An Air Fryer?
For optimal results, set the air fryer to a temperature of 380°f (193°c) when cooking chicken livers. This allows the livers to cook evenly and develop a crispy exterior without becoming dry.
How Do I Prepare Chicken Livers Before Cooking In An Air Fryer?
To prepare chicken livers for cooking in an air fryer, start by rinsing them under cold water and patting them dry with paper towels. Remove any membranes or connective tissue, and season them with your preferred spices or marinade.
How Do I Know When Chicken Livers Are Cooked In An Air Fryer?
To check if chicken livers are cooked in an air fryer, use a meat thermometer to ensure they reach an internal temperature of 165°f (74°c). Additionally, the livers should have a crisp golden exterior and no signs of pink or rawness in the center.
What Are Some Serving Suggestions For Cooked Chicken Livers From An Air Fryer?
Cooked chicken livers from an air fryer can be served as a standalone appetizer, added to salads, used as a topping for toast or crackers, or incorporated into various recipes like pâtés or stir-fries. Get creative and enjoy the rich flavor and versatility of chicken livers!
Conclusion
To sum it up, cooking chicken livers in an air fryer is a quick and convenient way to enjoy this flavorful and nutrient-rich ingredient. With the right techniques, you can achieve a crispy and delicious result every time. By marinating the livers beforehand, you can infuse them with additional flavors and tenderize the meat.
Preheating the air fryer and laying the livers in a single layer ensures even cooking and a golden-brown exterior. Don’t forget to flip the livers halfway through the cooking process for optimum results. Experiment with different seasonings and accompaniments to customize your dish to your taste preferences.
Whether you’re looking to enjoy a wholesome snack or create a main course, the air fryer is a versatile tool that can elevate your cooking experience. So, why not give it a try and discover your new favorite way to enjoy chicken livers?
Happy cooking!