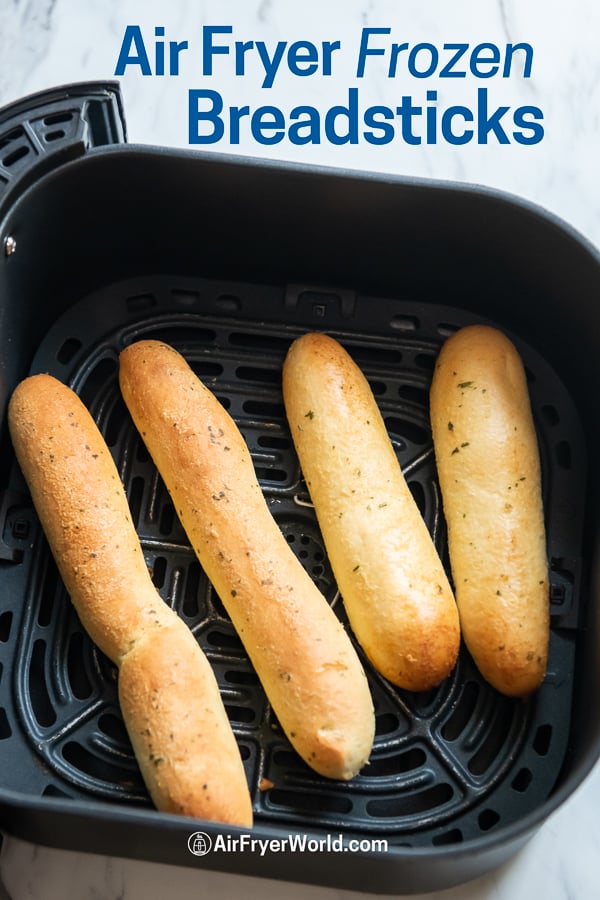
To cook breadsticks in an air fryer, it takes approximately 10-12 minutes. When it comes to preparing delicious breadsticks, many people opt for using an air fryer.
With its ability to provide a crispy and golden exterior, while maintaining a soft and fluffy interior, an air fryer is a popular choice for baking breadsticks. Whether you are hosting a party or simply craving a tasty snack, cooking breadsticks in an air fryer is a quick and convenient option.
But how long does it take to cook them? In just around 10-12 minutes, your breadsticks will be perfectly cooked and ready to be enjoyed. So get your air fryer ready, and let’s dive into the world of crispy and delightful breadsticks.
Credit: www.melaniecooks.com
Understanding The Air Fryer Cooking Method
Air fryers have become a popular kitchen appliance for their ability to cook food quickly and with less oil. If you’re wondering how long to cook breadsticks in an air fryer, understanding the air fryer cooking method is key. In this section, we’ll delve into the inner workings of an air fryer and explore the benefits of using this innovative cooking appliance for making delicious breadsticks.
How Does An Air Fryer Work?
- An air fryer uses hot air circulation to cook food, similar to a convection oven but in a smaller and more compact size.
- The air fryer has a heating element and a powerful fan that circulates the hot air around the food, creating a crispy exterior while keeping the interior moist.
- The hot air rapidly cooks the food, reducing cooking time significantly compared to traditional methods.
- The cooking chamber of the air fryer is designed to mimic the environment of deep-frying without the need for excess oil, resulting in healthier meals.
Benefits Of Using An Air Fryer For Cooking Breadsticks
- Quick and efficient cooking: Air fryers cook food faster than conventional ovens, so your breadsticks will be ready in no time.
- Less oil, healthier option: By using only a small amount of oil or sometimes even none at all, air fryers provide a healthier alternative to deep-frying breadsticks.
- Crispy exterior, soft interior: Air fryers deliver that perfect combination of a crispy exterior and tender interior, making your breadsticks irresistibly delicious.
- Easy cleanup: With no messy oil to deal with, cleaning up after cooking breadsticks in an air fryer is a breeze. Just remove the basket or tray and give it a quick wash.
- Versatility: Air fryers are not limited to breadsticks. You can use them to cook a variety of other foods, from french fries to chicken wings, making it a versatile addition to your kitchen.
Whether you’re a cooking enthusiast or someone looking for a healthier cooking method, using an air fryer to cook breadsticks is a game-changer. With its efficient cooking process and numerous benefits, it’s no wonder air fryers have gained so much popularity.
So, let’s dive into the specifics of cooking breadsticks in an air fryer and find out the perfect cooking time!
Factors Affecting Cooking Time
Cooking breadsticks in an air fryer is a quick and convenient way to enjoy this delicious snack. However, the cooking time can vary based on several factors. Understanding these factors will help you achieve perfectly cooked breadsticks every time. Let’s take a closer look at the key factors that affect cooking time:
Temperature Settings For Perfect Breadstick Cooking
- The temperature setting you choose on your air fryer plays a crucial role in cooking breadsticks. Different air fryers may have different temperature ranges, so it’s important to follow the manufacturer’s instructions.
- For crispy and golden-brown breadsticks, a high temperature setting, around 375°f (190°c), is generally recommended.
- If you prefer softer breadsticks with a slightly doughy center, you can opt for a lower temperature setting, around 350°f (175°c).
The Thickness Of Breadsticks And Its Impact On Cooking Time
- The thickness of your breadsticks will significantly impact the cooking time in the air fryer. Thicker breadsticks will take longer to cook, while thinner ones will cook more quickly.
- If you’re making homemade breadsticks, ensure they are relatively uniform in thickness to ensure even cooking. If they vary in thickness, you may need to remove the thinner ones earlier to prevent overcooking.
- As a general guideline, breadsticks that are about 1/2 to 3/4 inch thick will usually cook in around 10-12 minutes at the recommended temperature settings.
Different Dough Types And Their Cooking Requirements
- The type of dough used for making breadsticks can also affect the cooking time. Some doughs are more dense or contain more moisture than others, which can influence how long they need to cook.
- Traditional dough recipes that use all-purpose flour and standard rising agents tend to cook within the average time frame mentioned earlier.
- However, if you’re using specialty doughs such as whole wheat, gluten-free, or sourdough, be aware that they may require slightly longer cooking times. These types of doughs often benefit from a slightly lower temperature and longer cooking duration to ensure they are fully cooked.
- Pay attention to the texture and color of your breadsticks as they cook, and adjust the cooking time accordingly to achieve the desired results.
By considering these factors – temperature settings, breadstick thickness, and dough types – you will have the knowledge to determine the perfect cooking time for your air-fried breadsticks. Experiment with these variables to find your preferred balance of crispness and softness.
Enjoy your homemade breadsticks straight from the air fryer, and delight in their deliciousness with every bite!
Cooking Time And Temperature Recommendations For Breadsticks
Breadsticks are a versatile and delicious snack that can be enjoyed on their own or paired with a variety of dips and sauces. Cooking breadsticks in an air fryer can take your snacking game to the next level, providing a crispy exterior and a warm, soft interior.
However, achieving the perfect texture and flavor is all about getting the cooking time and temperature just right. In this section, we will explore the cooking time and temperature recommendations for classic breadsticks, garlic breadsticks, and cheese-filled breadsticks to help you create the perfect batch every time.
Classic Breadsticks: Crispy And Golden-Brown
- Preheat your air fryer to 350°f (175°c) for about 5 minutes.
- Place the breadsticks in a single layer in the air fryer basket, ensuring they have enough space between them to allow the hot air to circulate.
- Cook the breadsticks at 350°f (175°c) for 8-10 minutes, flipping them halfway through to ensure even browning.
- Keep a close eye on the breadsticks during the last few minutes of cooking to prevent them from getting too dark. Adjust the cooking time slightly if needed based on your desired level of crispiness.
- Once cooked, remove the breadsticks from the air fryer and allow them to cool for a few minutes before serving. The outside should be crispy and golden-brown, while the inside remains soft and fluffy.
Garlic Breadsticks: Adding Flavor Without Compromising Texture
- Preheat your air fryer to 350°f (175°c) for about 5 minutes.
- In a small bowl, combine melted butter, minced garlic, and your choice of herbs or seasonings. Mix well.
- Brush the garlic mixture generously onto the breadsticks, ensuring they are evenly coated.
- Place the garlic-coated breadsticks in a single layer in the air fryer basket, leaving enough space between them for air circulation.
- Cook the garlic breadsticks at 350°f (175°c) for 8-10 minutes, flipping them halfway through to ensure even cooking and to prevent the garlic from burning.
- Once cooked, remove the breadsticks from the air fryer and allow them to cool for a few minutes before serving. The garlic-infused flavor will have permeated the breadsticks, adding a delicious aromatic touch to every bite.
Cheese-Filled Breadsticks: Achieving The Perfect Melt
- Preheat your air fryer to 350°f (175°c) for about 5 minutes.
- Cut the bread dough into strips and roll them into thin rectangles.
- Add your favorite cheese in the center of each rectangle and fold the dough over to seal it, creating a cheese-filled breadstick.
- Place the cheese-filled breadsticks in a single layer in the air fryer basket, giving them enough space to expand as they cook.
- Cook the cheese-filled breadsticks at 350°f (175°c) for 10-12 minutes, flipping them once during cooking to ensure they are evenly cooked and the cheese melts perfectly.
- Keep an eye on the breadsticks towards the end of the cooking time to ensure the cheese doesn’t ooze out excessively.
- Once cooked, remove the breadsticks from the air fryer and allow them to cool for a few minutes before serving. The cheese should be melted and gooey, creating a delightful mixture of flavors and textures.
With these cooking time and temperature recommendations, you can confidently prepare classic breadsticks, garlic breadsticks, and cheese-filled breadsticks in your air fryer, impressing your guests or simply treating yourself to a flavorsome snack. Experiment with different seasonings and dips to customize your breadstick creations.
Enjoy the delightfully crunchy exteriors and soft, fluffy interiors that the air fryer can help you achieve.
Classic Breadsticks
Are you craving that perfect combination of soft and crunchy breadsticks? Look no further! In this section, we will guide you through the process of cooking classic breadsticks in an air fryer to achieve the ideal texture and taste. Whether you are using store-bought or homemade breadsticks, we have got you covered with all the necessary information.
So let’s get started!
Preheating The Air Fryer For Consistent Results
Before you start cooking your breadsticks, it is crucial to preheat your air fryer. This step ensures consistent results and even cooking throughout the breadsticks. Here are the key points to remember:
- Preheat the air fryer at the recommended temperature stated in your appliance’s manual. Usually, it is around 350°f (175°c).
- Allow the air fryer to preheat for a few minutes to ensure it reaches the desired temperature.
- Avoid overcrowding the air fryer basket. Arrange the breadsticks in a single layer and leave some space between them for proper air circulation.
Cooking Time And Temperature For Store-Bought Vs. Homemade Breadsticks
The cooking time and temperature may differ slightly depending on whether you are using store-bought or homemade breadsticks. Here’s what you need to know:
Store-bought breadsticks:
- Set the air fryer temperature to 350°f (175°c).
- Cook the store-bought breadsticks for approximately 5-7 minutes, or until they turn golden brown and crispy.
- Flip the breadsticks halfway through the cooking time for even browning.
Homemade breadsticks:
- Adjust the air fryer temperature to 375°f (190°c) for homemade breadsticks.
- Cook the breadsticks for about 10-12 minutes, or until they are nicely golden and crispy.
- Flip the breadsticks halfway through the cooking process to ensure they are evenly cooked.
Achieving A Soft Or Crunchy Texture
The texture of your breadsticks can be adjusted according to your preferences. Whether you prefer them soft or crunchy, follow these tips:
For softer breadsticks:
- Cook your breadsticks for a slightly shorter time, keeping an eye on them.
- Remove them from the air fryer when they are lightly golden and still have a soft center.
- Let them cool for a few minutes before serving to ensure they reach the desired consistency.
For crunchier breadsticks:
- Extend the cooking time slightly, until the breadsticks are well-browned and crispy.
- Cook them until they reach your desired level of crunchiness. Be careful not to overcook and burn them.
Now that you have all the information you need, it’s time to put your air fryer to work and enjoy delicious classic breadsticks with the perfect texture. Get creative with seasonings and dips to make it an unforgettable snacking experience.
Happy cooking!
Garlic Breadsticks
Infusing The Garlic Flavor Into The Breadsticks:
Garlic breadsticks are a delicious and aromatic twist on the classic breadstick. The infusion of garlic adds an irresistible flavor that will keep you coming back for more. Here’s how you can achieve the perfect garlic flavor in your air fryer breadsticks:
- Begin by mincing fresh garlic cloves or using garlic powder to season the dough.
- Roll out the breadstick dough and brush it with melted butter infused with garlic for an even distribution of flavor.
- For an extra kick, sprinkle some dried herbs such as parsley, oregano, or basil on top of the garlic-infused butter.
- To intensify the garlic flavor, let the dough rest for a few minutes before air frying to allow the garlic to infuse further.
Adjusting Cooking Time For Fresh Vs. Pre-Packed Garlic Breadsticks:
The cooking time for garlic breadsticks may vary depending on whether you are using fresh or pre-packed breadsticks. Here’s how you can adjust the cooking time accordingly:
For fresh garlic breadsticks:
- Air fry the breadsticks at a temperature of 375°f (190°c) for approximately 8 to 10 minutes.
- Flip the breadsticks halfway through the cooking process to ensure an even golden brown color on all sides.
For pre-packed garlic breadsticks:
- Follow the instructions on the packaging as some pre-packed garlic breadsticks may require a different cooking temperature or time.
- Typically, pre-packed breadsticks can be air fried at 375°f (190°c) for around 6 to 8 minutes.
- Keep a close eye on them to prevent burning as they may cook faster than fresh garlic breadsticks.
Avoiding Burnt Garlic During The Cooking Process:
Burnt garlic can ruin the entire flavor and aroma of your garlic breadsticks. To ensure that your garlic remains perfectly golden and avoids burning, consider the following tips:
- While brushing the breadsticks with garlic-infused butter, make sure to evenly distribute the garlic and butter mixture across each breadstick.
- Avoid overcrowding the air fryer basket, as this can lead to uneven cooking and increase the chances of burning the garlic.
- Monitor the breadsticks closely during the cooking process and check for any signs of burning. Adjust the cooking time if necessary, but be careful not to undercook them.
- If you notice the garlic is browning too quickly, reduce the temperature slightly to prevent further burning while allowing the breadsticks to cook thoroughly.
By following these tips, you can achieve perfectly cooked and mouthwatering garlic breadsticks in your air fryer. Enjoy the delightful combination of crispy bread and flavorful garlic in every bite.
Cheese-Filled Breadsticks
Air fryers have become a popular addition to the kitchen, offering a healthier alternative to deep frying. Not only can they create crispy and delicious dishes, but they also provide a quick and convenient way to cook a variety of foods.
If you’re a fan of cheese-filled breadsticks, you might be wondering how long to cook them in an air fryer to achieve the perfect golden crust and oozy melted cheese. In this post, we’ll delve into the details of cooking cheese-filled breadsticks in an air fryer, ensuring even melting of the cheese filling, discussing the cooking time for frozen versus fresh breadsticks, and sharing tips on preventing cheese leakage during the cooking process.
Ensuring Even Melting Of Cheese Filling:
- Preheat the air fryer to the recommended temperature, usually between 350°f to 400°f.
- Arrange the cheese-filled breadsticks in a single layer on the air fryer basket or tray, ensuring they have enough space to cook evenly.
- Flip the breadsticks halfway through the cooking time to ensure that the cheese filling melts uniformly.
- If you notice any cheese that has leaked out, carefully remove it from the air fryer to prevent burning and maintain the quality of the breadsticks.
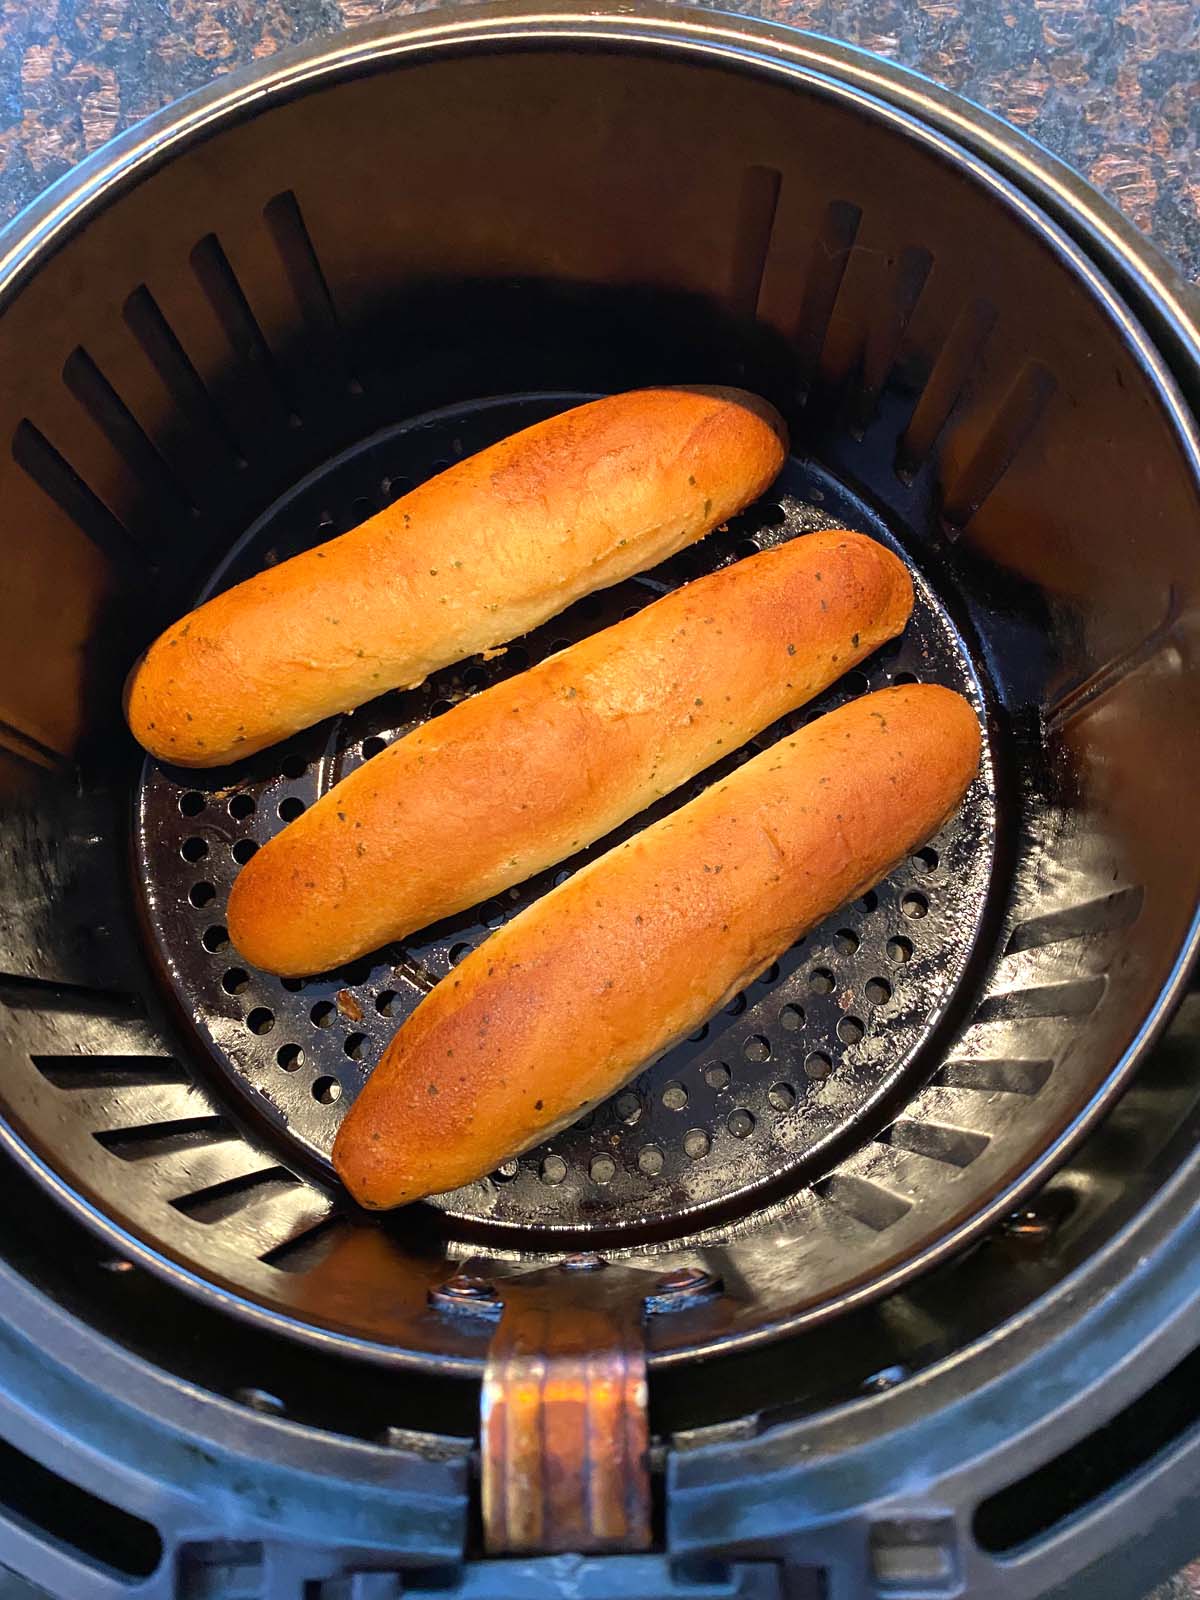
Cooking Time For Frozen Vs. Fresh Cheese-Filled Breadsticks:
- Frozen cheese-filled breadsticks generally require a slightly longer cooking time than fresh ones.
- Follow the instructions provided on the packaging for the most accurate cooking time. If none are available, start with a cooking time of around 12-15 minutes for frozen breadsticks.
- For fresh cheese-filled breadsticks, reduce the cooking time to around 8-10 minutes to avoid overcooking or burning.
Preventing Cheese Leakage During Cooking:
- Ensure that the cheese filling is fully enclosed within the bread dough. Pinch the edges tightly to seal them and minimize the risk of cheese leakage.
- Prior to cooking, freeze the cheese-filled breadsticks for about 15-30 minutes. This will help the cheese stay in place during the cooking process.
- If you notice any signs of cheese starting to leak, quickly remove the breadsticks from the air fryer and adjust the cooking time to prevent further leakage.
Now that you have a better understanding of how long to cook cheese-filled breadsticks in an air fryer, you can enjoy these delectable treats with confidence. Whether you’re using frozen or fresh breadsticks, following these tips will ensure a perfectly cooked result every time.
So, gather your ingredients, preheat your air fryer, and get ready to indulge in ooey-gooey, cheesy goodness!
Tips And Tricks For Perfectly Cooked Breadsticks
Cooking breadsticks in an air fryer can result in a delicious and crispy treat that’s perfect for snacking or serving as a side dish. To achieve the best results, here are some tips and tricks to keep in mind:
- Poking holes to let steam escape: Before cooking the breadsticks in the air fryer, it’s essential to poke a few holes on them using a fork or toothpick. This allows steam to escape during cooking, preventing the breadsticks from becoming too dense or doughy.
- Brushing butter or oil for enhanced flavor and texture: To give your breadsticks an extra boost of flavor and a golden texture, consider brushing them with melted butter or olive oil before placing them in the air fryer. This simple step can elevate their taste and create a satisfyingly crispy exterior.
- Rotating breadsticks for even browning: To ensure that your breadsticks cook evenly, it’s a good idea to rotate them halfway through the cooking process. This helps to achieve consistent browning on all sides, resulting in a visually appealing and delicious final product.
Remember to adjust the cooking time and temperature according to your air fryer’s specifications and the thickness of your breadsticks. With these tips in mind, you’ll be able to enjoy perfectly cooked breadsticks every time you use your air fryer.
Troubleshooting Common Issues
Undercooked Or Doughy Breadsticks
If your breadsticks turn out undercooked or doughy in the air fryer, it can be frustrating after all the effort put into making them. Here are some key points to troubleshoot and avoid this issue:
- Check the cooking time and temperature: Make sure you followed the recipe instructions correctly and set the recommended time and temperature for cooking the breadsticks in the air fryer.
- Preheat the air fryer: Preheating the air fryer helps to ensure even cooking and crisping of the breadsticks. Allow the air fryer to preheat for a few minutes before placing the breadsticks inside.
- Adjust the cooking time: If your breadsticks are consistently undercooked, try increasing the cooking time in small increments until they are thoroughly cooked. Keep an eye on them during cooking to prevent overcooking.
- Check the size and thickness of the breadsticks: Thicker or larger breadsticks may require additional cooking time. Consider adjusting the shape or size of the breadsticks to ensure even cooking.
- Use the right equipment: Different air fryer models may have variations in cooking times and temperatures. Follow the manufacturer’s instructions for your specific model or refer to a trusted recipe.
- Test with a toothpick: To determine if the breadsticks are fully cooked, insert a toothpick or skewer into the center. If it comes out clean, without any doughy residue, the breadsticks are ready.
Overcooked Or Burnt Breadsticks
Overcooking or burning breadsticks can result in a less-than-appetizing texture and taste. Here are a few tips to help you avoid this issue:
- Monitor the cooking time: Keep a close eye on the breadsticks during the cooking process to prevent them from burning. Set a timer if needed and check the progress periodically.
- Adjust the temperature: If your breadsticks are consistently burning, try reducing the temperature slightly. Lowering the temperature can help prevent them from cooking too quickly on the outside while remaining doughy inside.
- Modify the recipe: Consider adjusting the recipe by using ingredients that are less prone to burning, such as adding a little more oil or butter to the dough. This can help create a more moisturized crust that doesn’t burn easily.
- Use a lower rack position: If your air fryer has multiple rack positions, try placing the breadsticks on a lower rack. This can help shield them from direct heat and prevent burning.
- Rotate the breadsticks: If you notice uneven browning during cooking, rotate the breadsticks using tongs. This helps ensure they cook evenly on all sides.
Unevenly Cooked Breadsticks
Unevenly cooked breadsticks can be disappointing, with some parts being too crispy while others remain undercooked. To achieve evenly cooked breadsticks in the air fryer, consider the following tips:
- Arrange the breadsticks properly: Make sure to leave enough space between each breadstick on the air fryer rack or basket. Overcrowding can lead to uneven cooking as hot air may not circulate freely.
- Rotate the breadsticks: During cooking, rotate the breadsticks halfway through the cooking time. This helps ensure all sides are exposed to the hot air, resulting in even browning.
- Adjust the cooking time and temperature: If you’re consistently experiencing uneven cooking, you may need to increase or decrease the cooking time and temperature slightly. Experiment with different settings to find the optimal cooking conditions for your air fryer.
- Check the air fryer’s fan: A malfunctioning fan can lead to uneven cooking. Make sure the fan is working properly and isn’t obstructed by any debris.
- Use similar-sized breadsticks: If you’re making breadsticks of different sizes, consider grouping them together based on their thickness. This allows you to adjust the cooking time accordingly and ensure consistent results.
Remember, troubleshooting these common issues is all part of perfecting your breadstick recipe in the air fryer. With a little practice and experimentation, you’ll be able to achieve deliciously cooked breadsticks that are crispy on the outside and tender on the inside every time.
Frequently Asked Questions For How Long To Cook Breadsticks In Air Fryer
How Long Should I Cook Breadsticks In An Air Fryer?
Typically, breadsticks should be cooked in an air fryer for about 8-10 minutes at 375°f. However, cooking times may vary depending on the brand and size of the air fryer, as well as the thickness of the breadsticks. It’s always a good idea to check them periodically to ensure they are cooked to your desired level of crispiness.
Are Air-Fried Breadsticks Healthier Than Traditional Ones?
Air-fried breadsticks are generally considered healthier than traditional deep-fried ones. Air frying uses little to no oil, resulting in lower fat content and fewer calories. However, keep in mind that the nutritional content of breadsticks primarily depends on the dough and ingredients used in the recipe.
Can I Make Homemade Breadsticks In An Air Fryer?
Absolutely! Making homemade breadsticks in an air fryer is a great option. Simply prepare your dough, shape the breadsticks, and place them in the air fryer basket. Cook at the recommended temperature and time, and you’ll have delicious homemade breadsticks with a crispy exterior and a soft interior.
Don’t forget to brush them with melted butter or olive oil for added flavor.
How To Cook Skirt Steak In Air Fryer?
Here you can get best selling Air Fryer
Conclusion
Cooking breadsticks in an air fryer is a quick and convenient way to achieve that perfect golden crust and soft center. The air fryer’s hot circulating air ensures even cooking, resulting in delicious breadsticks every time. By preheating the air fryer and brushing the breadsticks with melted butter or olive oil, you can enhance their flavor and achieve a desirable crispy exterior.
The cooking time will vary depending on the thickness of the breadsticks, but generally, it takes about 8-10 minutes at 375°f. However, it’s important to keep an eye on them to prevent overcooking or burning. Whether you’re serving them as an appetizer, accompaniment to a meal, or as a snack, the air fryer offers a convenient and efficient way to enjoy freshly baked breadsticks without the need for a traditional oven.
Happy cooking!